WAMP یک سرور مجازی روی رایانه شماست که به شما امکان میدهد بدون هیچ ریسکی تمام قابلیتهای وردپرس را آزمایش کنید. این سرور مستقل از اینترنت عمل میکند و یک محیط توسعه وب محبوب است. برای دانلود و نصب WampServer در ویندوز، مراحل زیر را دنبال کنید.
فهرست مطالب
- دانلود فایل نصب WampServer در ویندوز
- نصب کننده WampServer را اجرا کنید
- زبان نصب کننده را انتخاب کنید
- توافقنامه مجوز WampServer را بپذیرید
- اطلاعات را با دقت بخوانید
- انتخاب گزینههای نصب WampServer در ویندوز
- منتظر بمانید تا نصب کامل شود
- اطلاعات استفاده از WampServer را بخوانید
- نصب را کامل کنید
- WampServer را اجرا کنید
- نصب را تایید کنید
- نتیجهگیری
دانلود فایل نصب WampServer در ویندوز
اگر مراحل وبسایت رسمی WampServer برای شما سخت بود، میتوانید نسخه سازگار با سیستم عامل ویندوز خود (64-بیتی یا 32-بیتی) را از این لینک دانلود کنید.
نصب کننده WampServer را اجرا کنید
پس از دانلود فایل نصب، به محلی که فایل در آن ذخیره شده است بروید و روی آن دوبار کلیک کنید تا فرآیند نصب شروع شود. در ادامه ممکن است لازم باشد مجوزهای مدیریتی را اعطا کنید.
زبان نصب کننده را انتخاب کنید
زبان مورد نظر خود را انتخاب کنید و روی تایید کلیک کنید.

توافقنامه مجوز WampServer را بپذیرید
در طول فرآیند نصب، توافقنامه مجوز WAMP به شما نمایش داده میشود. آن را مطالعه کنید و اگر مشکلی نداشت، روی گزینه I accept the agreement و سپس دکمه Next برای ادامه کلیک کنید.

اطلاعات را با دقت بخوانید
قبل از نصب WampServer، باید مطمئن شوید که عناصر خاصی روی سیستم شما نصب شدهاند. در غیر این صورت، WampServer اجرا نخواهد شد و نصب با مشکل مواجه خواهد شد. در این صورت و قبل از نصب عناصر ناموجود، باید WampServer را حذف کنید.
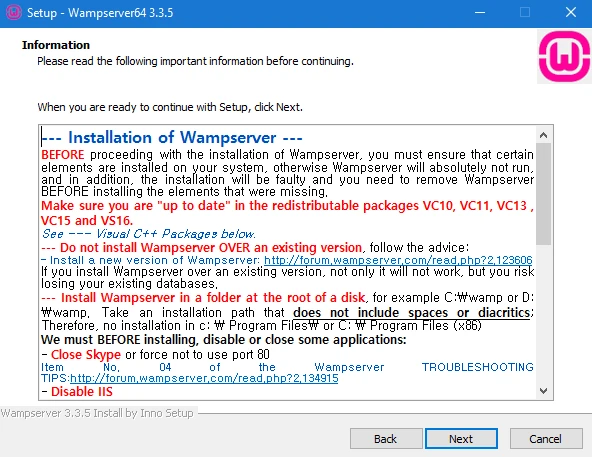
ممکن است به طور خاص با موقعیتی مواجه شوید که یک یا چند بستهی Visual C++ Redistributable روی سیستم شما نصب نشده باشد. بهترین راه برای نصب آنها، دانلود و اجرای فایل exe آخرین نسخه VisualCppRedist AIO سازگار با سیستم عامل ویندوز شما است.
اگر سیستم شما 32-بیتی است، VisualCppRedist_AIO_x86only.exe و اگر سیستم شما 64-بیتی است، VisualCppRedist_AIO_x86_x64.exe را دانلود کنید. پس از دانلود، روی فایل دوبار کلیک کنید و مراحل نصب بستههای مورد نیاز را ادامه دهید. نصب آسان است: ابتدا روی Next کلیک کنید، تا پایان صبر کنید و سپس پس از نصب روی Finish کلیک کنید.
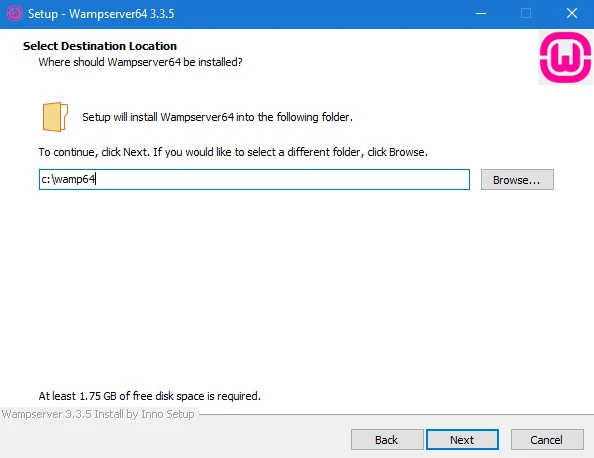
انتخاب گزینههای نصب WampServer در ویندوز
در مرحله بعد، از شما خواسته میشود گزینههای نصب را انتخاب کنید. به طور پیشفرض، WampServer در دایرکتوری C:\wamp64 (در درایو سیستم عامل) شما نصب میشود. در صورت تمایل میتوانید این مکان را تغییر دهید. اگر نمیخواهید هنگام نصب ویندوز جدید، وبسایتهای محلی خود را از دست بدهید، WAMP را در درایوی غیر از درایو ویندوز خود نصب کنید.
پس از انتخاب تنظیمات برگزیده، با کلیک بر روی دکمه Next یا Install نصب را ادامه دهید.
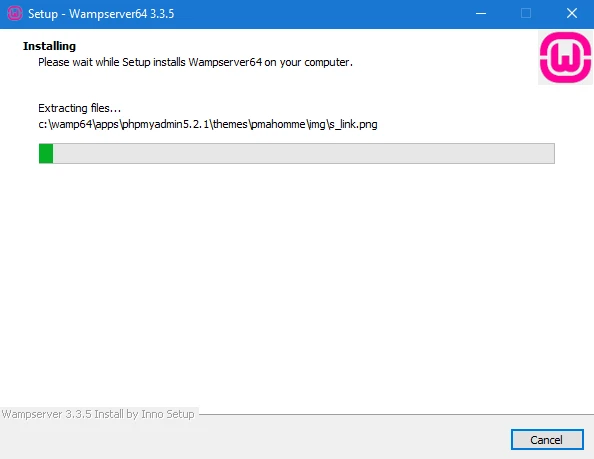
منتظر بمانید تا نصب کامل شود
بسته به سرعت سیستم شما، فرآیند نصب ممکن است چند دقیقه طول بکشد. صبور باشید و منتظر بمانید تا نوار پیشرفت به 100% برسد.
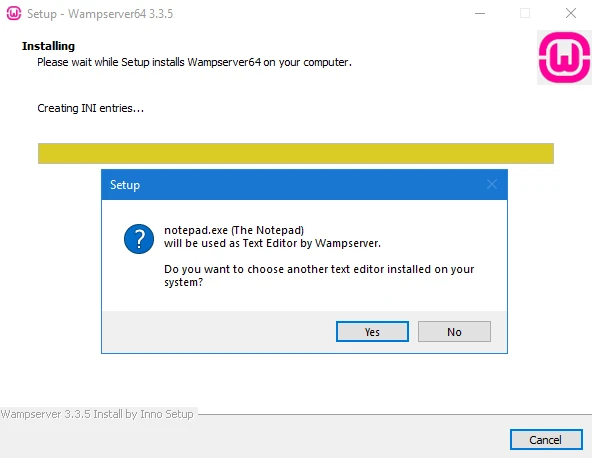
علاوه بر این، ممکن است از شما خواسته شود مرورگر وب پیشفرض و ویرایشگر متنی را که قرار است با WampServer استفاده شود، انتخاب کنید. گزینه پیشفرض ویرایشگر متن، برنامه Notepad است. اگر نمیخواهید از آن استفاده کنید، روی Yes کلیک کرده و برنامه مورد نظر خود را انتخاب کنید.
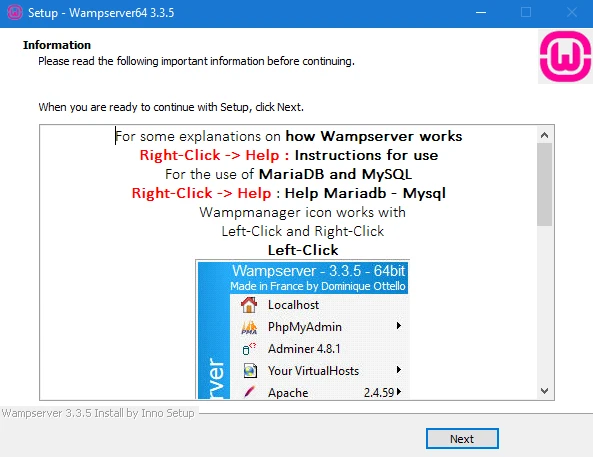
اطلاعات استفاده از WampServer را بخوانید
چند لحظه وقت بگذارید و اطلاعات اولیهای در مورد نحوه استفاده از WAMP بخوانید.
نصب را کامل کنید
پس از اتمام نصب، یک پیام تایید مبنی بر موفقیتآمیز بودن نصب WampServer دریافت خواهید کرد. روی دکمه Finish کلیک کنید.

WampServer را اجرا کنید
شما میتوانید WAMP را با رفتن به پوشه نصب (به طور پیشفرض، C:\wamp64) و دوبار کلیک کردن روی آیکون WampServer اجرا کنید. همچنین میتوانید این آیکون را در منوی استارت ویندوز پیدا کنید. این کار کنترل پنل WampServer را اجرا میکند.
نصب را تایید کنید
پس از اجرای WampServer، میتوانید با باز کردن مرورگر وب خود و تایپ کردن کلمه localhost در نوار آدرس، از عملکرد صحیح آن اطمینان حاصل کنید. اگر WampServer به درستی نصب شده باشد، باید صفحه اصلی WampServer را مشاهده کنید که نشان میدهد همه چیز به درستی کار میکند.
نتیجهگیری
تبریک! شما با موفقیت WampServer را روی رایانه ویندوزی خود دانلود و نصب کردید. اکنون میتوانید از آن برای توسعه و آزمایش برنامههای وب خود (مانند وردپرس) به صورت محلی استفاده کنید.
تمام قسمتهای این مجموعه

دیدگاهتان را بنویسید