تصویر پیشفرض محصولات (placeholder) ووکامرس گاهی با ظاهر و سبک فروشگاه شما همخوانی ندارد. در این مقاله بهصورت گامبهگام تغییر تصویر جایگزین ووکامرس را یاد میگیرید تا محصولات خود را با تصاویر دلخواه نمایش دهید. این کار به ظاهر حرفهایتر فروشگاه و تجربه بهتر کاربران کمک میکند.
فهرست مطالب
اول، وارد پیشخوان مدیریت وردپرس شوید
وارد پیشخوان مدیریت سایت وردپرسی خودتان شوید. اگر با مشکل مواجه شدید، این مقاله را بخوانید: چگونه وارد پیشخوان مدیریت وردپرس شویم
دوم، تصویر جایگزین ووکامرس جدید را آپلود کنید
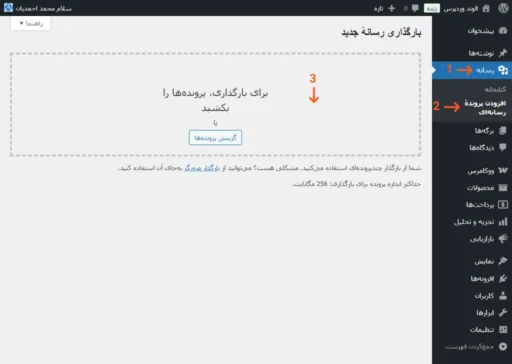
شما باید یک تصویر جدید آپلود کنید. از منوی کناری، به رسانه > افزودن پروندهٔ رسانهای بروید. پس از آن، تصویر جدید را به قسمت مشخص شده بکشید و رها کنید. یا میتوانید روی گزینش پروندهها کلیک کنید و تصویر خود را انتخاب کنید.
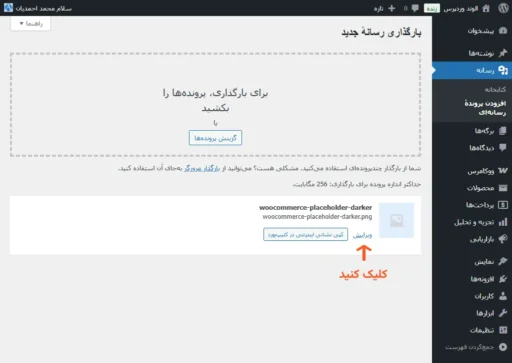
پس از آپلود تصویر، روی لینک ویرایش کلیک کنید.
شماره شناسه تصویر را کپی کنید. همانطور که در آدرس اینترنتی برگه مرورگر صفحه باز شده زیر مشاهده میکنید، این شماره پس از ?post= وجود دارد. به مثال زیر توجه کنید:
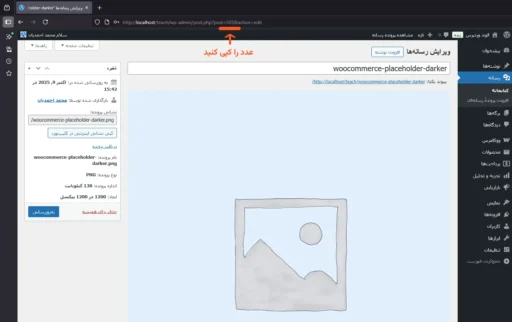
در این مورد، شماره شناسه تصویر، 503 است.
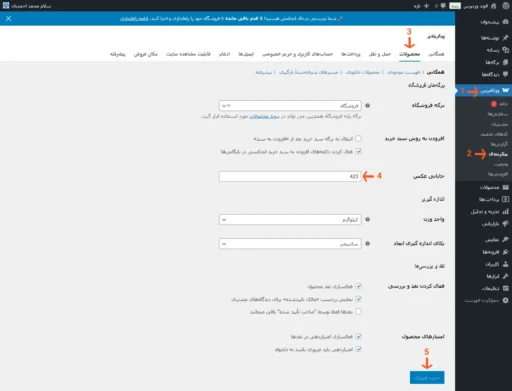
سوم، تصویر جایگزین ووکامرس را تغییر دهید
از منوی کناری به مسیر ووکامرس > پیکربندی > محصولات > جایابی عکس بروید. سپس مقدار آن را با شماره شناسه تصویر جدیدی که در مرحله قبل کپی کردهاید، جایگزین کنید. حالا، روی ذخیره تغییرات در پایین صفحه کلیک کنید.
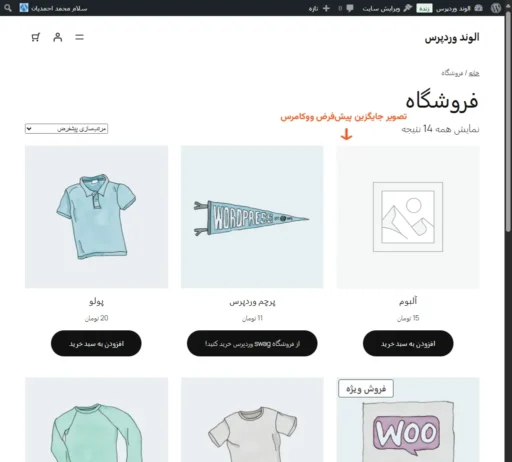
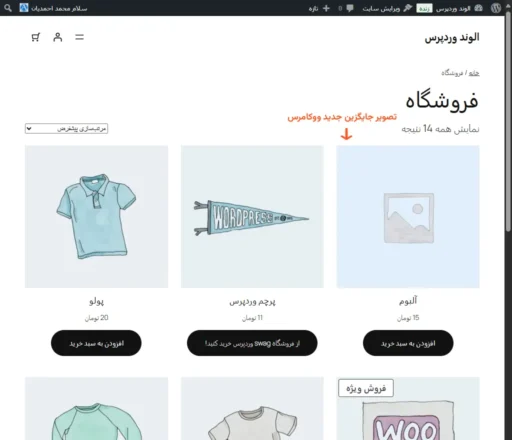
در آخر، مشاهده نتیجه تغییر تصویر جایگزین ووکامرس
این هم تصویر جایگزین ووکامرس جدید در همان وبسایت:
نتیجهگیری
تغییر تصویر جایگزین ووکامرس ساده و سریع است و با چند مرحله کوتاه میتوانید ظاهر فروشگاه خود را شخصیسازی کنید. با اعمال این تغییر، محصولات شما بهتر نمایش داده میشوند و تجربه خرید کاربران بهبود مییابد.

دیدگاهتان را بنویسید