وردپرس یک پلتفرم محبوب برای ایجاد وبسایت است. اگر میخواهید یک سایت وردپرس را به صورت محلی توسعه دهید، WAMP (مخفف Windows و Apache و MySQL و PHP) ابزاری عالی است. این راهنما شما را در مراحل نصب وردپرس روی WampServer راهنمایی میکند.
فهرست مطالب
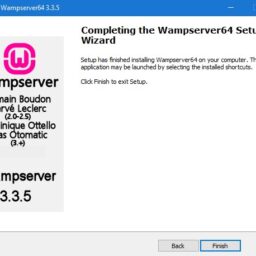
دانلود و نصب WampServer
ابتدا، WAMP را دانلود و نصب کنید. میتوانید از دستورالعملهای موجود در این پست وبلاگ استفاده کنید: نحوه نصب WampServer در ویندوز برای راهاندازی وردپرس محلی
اجرای WampServer روی ویندوز
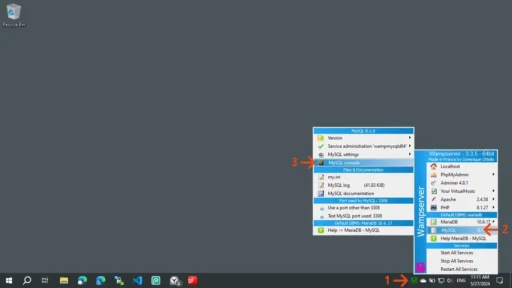
پس از نصب، WampServer را از منوی استارت باز کنید. باید یک آیکون سبز WAMP در نوار وظیفه ویندوز (پایین سمت راست، در قسمت اعلانات و کنار ساعت) ببینید. این نشان میدهد که همه چیز به درستی اجرا میشود.
ایجاد پایگاه داده در WampServer
حالا روی آیکون WampServer کلیک کنید، به MySQL بروید و MySQL console را باز کنید.
برای نام کاربری از root استفاده کنید و روی “OK” کلیک کنید. سپس، رمز عبور را خالی بگذارید و دکمه “Enter” را فشار دهید (مگر اینکه در هنگام راهاندازی MySQL رمز عبوری تنظیم کرده باشید).
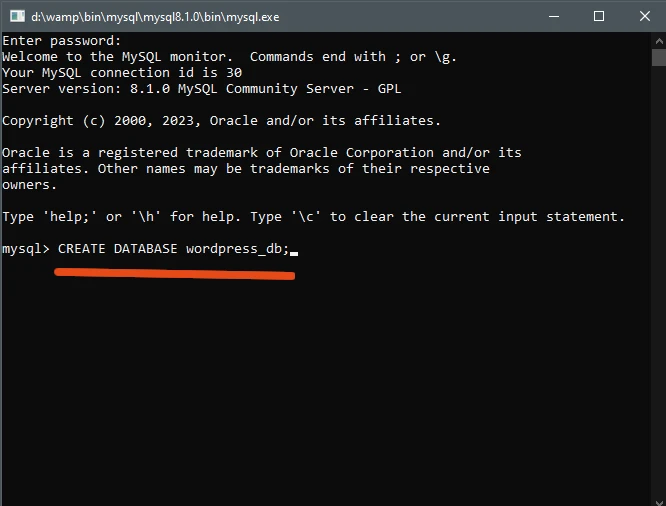
وقت آن است که با تایپ کردن دستور زیر، یک پایگاه داده جدید برای سایت وردپرس خود ایجاد کنید:
CREATE DATABASE wordpress_db;به جای wordpress_db نام پایگاه داده دلخواه خود را وارد کنید. دکمه “Enter” را فشار دهید و از کنسول خارج شوید (پنجره آن را ببندید).
دانلود و نصب وردپرس روی WampServer
دانلود وردپرس: آخرین نسخه را از وبسایت رسمی وردپرس دانلود کنید. اگر به وبسایت اصلی دسترسی نداشتید، میتوانید وردپرس را از این آدرس دانلود کنید.
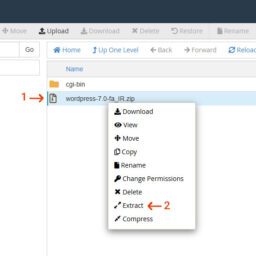
استخراج وردپرس: در مرحله بعد، فایل زیپ دانلود شده را در پوشه www نرم افزار WAMP استخراج کنید. به طور پیش فرض، این پوشه C:\wamp\www است.
تغییر نام پوشه: سپس، میتوانید نام پوشه استخراجشده وردپرس را به نام دلخواه سایت خود، مثلا mywebsite، تغییر دهید. در نتیجه، این پوشه بخشی از آدرس اینترنتی وبسایت محلی خواهد بود، در این مثال: http://localhost/mywebsite
پیکربندی نصب وردپرس
دسترسی به تنظیمات وردپرس: در این مرحله، مرورگر وب خود را باز کرده و به این آدرس اینترنتی بروید: http://localhost/mywebsite عبارت mywebsite را با آنچه قبلا وارد کردهاید جایگزین کنید. در مرحله بعد، صفحه تنظیمات وردپرس را مشاهده خواهید کرد.
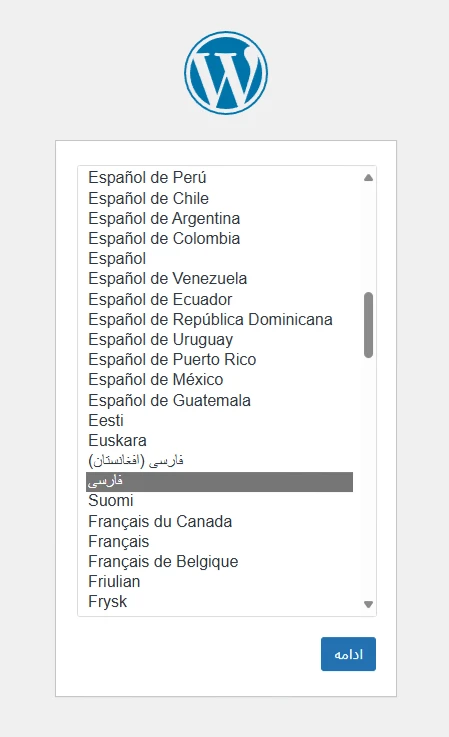
انتخاب زبان: زبان فارسی را انتخاب کرده و روی «ادامه» کلیک کنید.
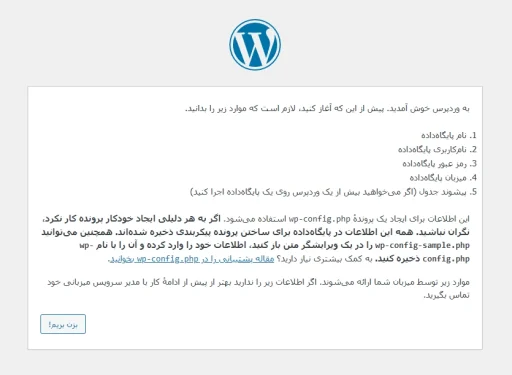
اطلاعات را بخوانید: پس از آن، در صفحه زیر، اطلاعاتی را خواهید یافت که قبل از شروع باید بدانید. شما یک پایگاه داده ایجاد کردهاید و نام کاربری و رمز عبور پیشفرض MySQL را دارید، بنابراین روی دکمه «بزن بریم!» کلیک کنید.
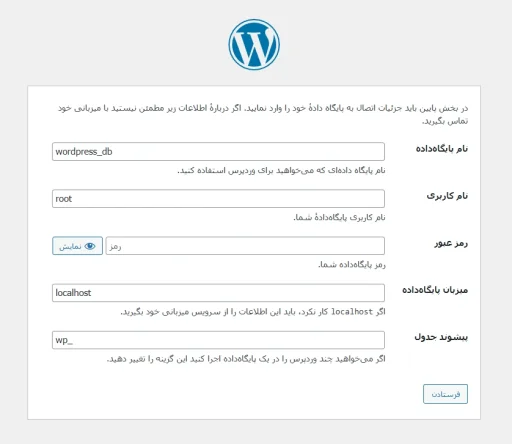
جزئیات پایگاه داده: اکنون، جزئیات پایگاه داده را وارد کنید:
نام پایگاه داده: wordpress_db (یا نامی که قبلا وارد کردید)
نام کاربری: root
رمز عبور: (این قسمت را خالی بگذارید مگر اینکه در هنگام تنظیم MySQL رمز عبوری تعیین کرده باشید.)
میزبان پایگاه داده: localhost
پیشوند جدول: wp_ (میتوانید این قسمت را به همین صورت رها کنید.)
ارسال: روی “فرستادن” کلیک کنید
اگر همه چیز درست باشد، دکمهی «راهاندازی نصب» را در صفحهی بعد خواهید دید. روی آن کلیک کنید.
نصب را تکمیل کنید
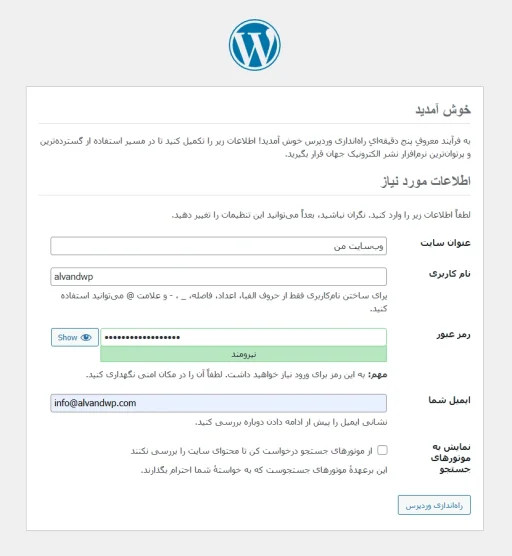
اطلاعات سایت و نصب: در اینجا، عنوان سایت، نام کاربری، رمز عبور و آدرس ایمیل خود را وارد کنید. مطمئن شوید که این جزئیات را به خاطر دارید. اکنون، روی دکمه “راهاندازی وردپرس” کلیک کنید.
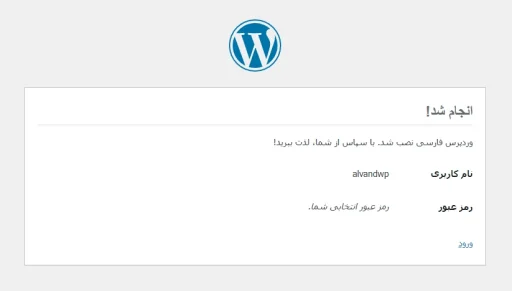
روی «ورود» کلیک کنید: پس از چند لحظه، باید پیام موفقیتآمیز بودن را مشاهده کنید. روی لینک «ورود» کلیک کنید.
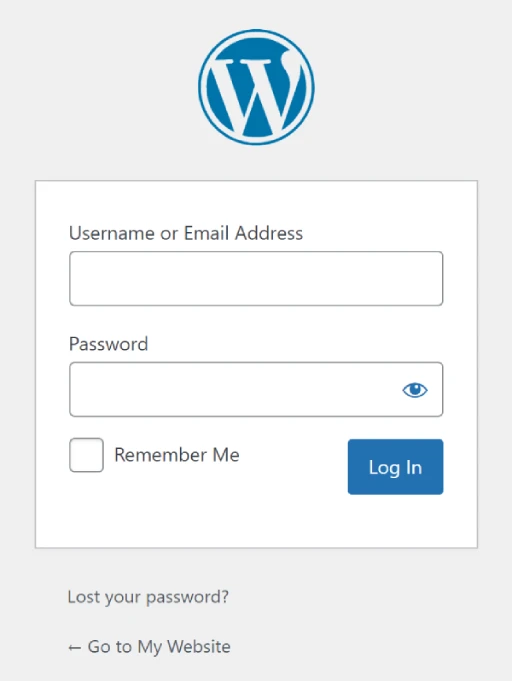
دوباره «ورود»: در نهایت، اطلاعات کاربری که قبلا تنظیم کردهاید را وارد کنید و دوباره روی «ورود» کلیک کنید.
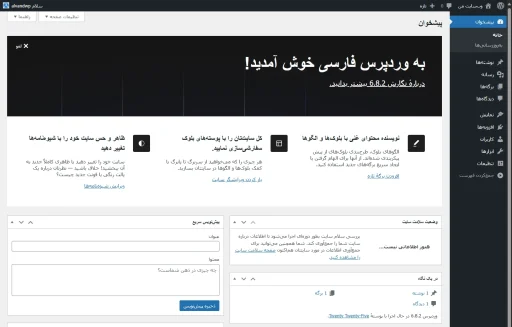
سایت وردپرس خود را آزمایش کنید
داشبورد مدیریت: بعد از کلیک روی لینک ورود (در صورتی که اطلاعات را صحیح وارد کرده باشید)، به داشبورد مدیریت سایت وردپرسی خودتان هدایت میشوید. از این به بعد برای دسترسی به داشبورد مدیریت، از طریق آدرس http://localhost/mywebsite/wp-admin اقدام کنید. دقت کنید که mywebsite همان نام پوشه وردپرس در کامپیوتر شما است که قبلا وارد کردید.
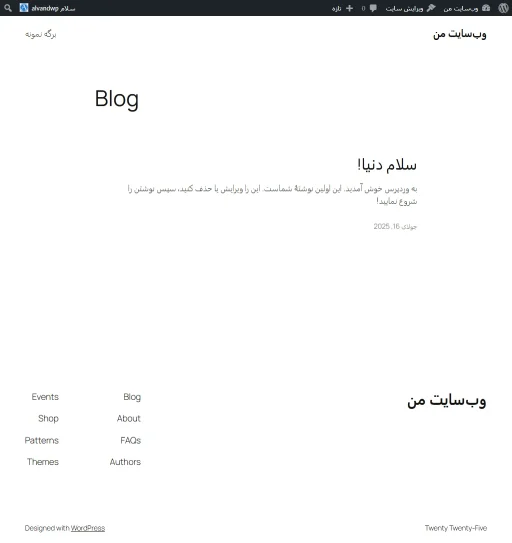
از سایت خود دیدن کنید: برای دیدن سایت وردپرس جدید خود به آدرس http://localhost/mywebsite مراجعه کنید.
نکات عیبیابی
رنگ آیکون WAMP: مطمئن شوید که آیکون WAMP سبز است. اگر نارنجی یا قرمز است، مشکلاتی با Apache یا MySQL وجود دارد. در این صورت، WampServer را مجدد راهاندازی کنید یا تداخل پورتها را بررسی کنید. گاهی اوقات، راهاندازی مجدد ویندوز این مشکلات را حل میکند.
مشکلات اتصال به پایگاه داده: اگر با خطاهای اتصال مواجه شدید، نام پایگاه داده، نام کاربری و رمز عبور خود را دوباره بررسی کنید.
حافظه پنهان مرورگر: اگر تغییرات را فوری مشاهده نکردید، حافظه پنهان (cache) مرورگر خود را پاک کنید.
نتیجهگیری
نصب وردپرس روی WAMP ساده است. این تنظیمات به شما امکان میدهد قبل از انتشار، سایت وردپرس خود را به صورت محلی توسعه داده و آزمایش کنید. با دنبال کردن این مراحل، میتوانید به سرعت وردپرس را روی دستگاه محلی خود اجرا کنید و محیطی قدرتمند برای توسعه وب در اختیار داشته باشید. برای سفارشیسازی بیشتر و ویژگیهای پیشرفته، به مستندات رسمی وردپرس مراجعه کنید.
تمام قسمتهای این مجموعه
دیدگاهتان را بنویسید